Prerequisites
This O2MC Studio installation guide describes the process of installing the O2MC Studio and provides the steps towards creating, publishing, and executing an example DimML file. Prerequisites for installing the O2MC Studio are
- The O2MC studio archive, which can be found here: O2MC Studio for Windows and O2MC Studio for OSx
- An O2MC user token created for you giving access for a specific set of domains and user groups
- An O2MC user string linekd to the user token, herafter referred to as ${user}
Installation
To install the O2MC Studio, follow these steps:
- Move the archive file to the desired directory (hereafter referred to as ${o2mcStudioDir})
- Extract the archive file (Windows: right mouse click, Extract All…)
- Open the ${o2mcStudioDir}/o2mc-studio/ directory
- Execute O2mcStudio
- Choose a default workspace directory. This directory is used to store your DimML files on your device
DimML plugin configuration
After opening the O2mc Studio, follow these steps to configure the DimML plugin:
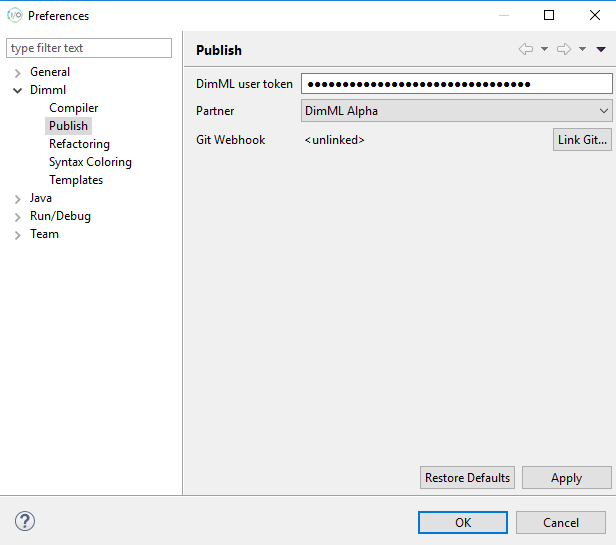
– In the menu bar, go to Window – Preferences
– In the left part of the Preferences dialog, go to Dimml – Publish
– Enter your DimML user token in the input field
– If a valid user token is given, the Partner dropdown box is automatically populated
– Select a user group from these options and click OK to finish the configuration
DimML specific parts of the O2mc Studio
The O2mc Studio provides syntax highlighting for DimML files and publishing functionality. Moreover, it comes with a default DimML perspective to make DimML development more convenient. A perspective is a specific configuration of views and their positioning within a window. The DimML perspective adds the DimML Explorer tab and enables the DimML console type in the Console view. All provided features are described in more details below.
Publishing
To publish DimML files in a project to the platform, open one of the DimML files in the project and click on the Publish DimML button in the toolbar at the top of the window. Alternatively, you can use the Ctrl+Shift+D shortcut.
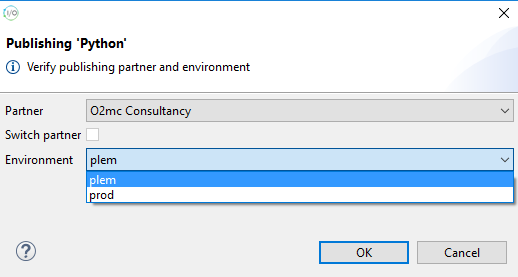
In the window that appears you can determine to which environment the project’s DimML files will be published. The Partner dropdown lists all user groups for which publishing is allowed for the configured user token. In case you change this value and this is automatically stored as the new default for future publishing. You can uncheck the Switch partner box to indicate that this partner selection should only be used for the current publish action.
The Environment dropdown can be used to publish files to the production environment. By default, this will show the user name linked to the configured user token. Changing this dropdown to prod will publish the DimML files to the production environmnt. To proceed with publishing click the OK button. If the prod environment was selected a confirmation window will appear as an extra warning that this action will affects a live website.
DimML Explorer
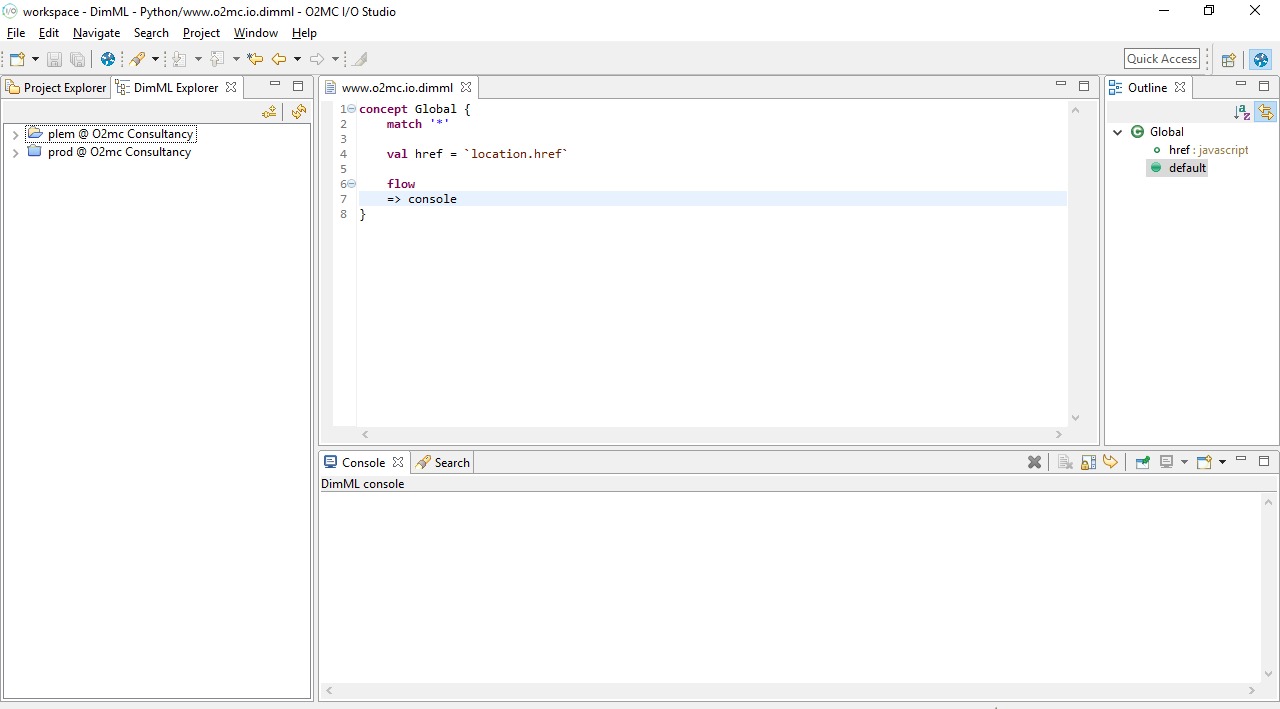
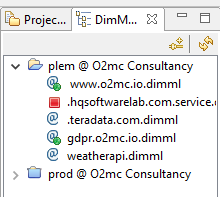
On the left side you can switch between the Project Explorer and the DimML Explorer. The DimML Explorer displays the published DimML files for the selected user group in the DimML plugin configuration. The user environment and production files are separated.
The files in the explorer tree are given icons that provide information about their platform status. Applications published to the production environment will only run for a whitelisted list of domains per partner. Reach out to your O2MC contact for adding new domains to the registered list.
In the user environment tree registered domains are indicated by adding a green light to domain files that would be allowed to run when published to production. Files without a green light should be added to the whitelist before they are actually executed after being published to production. All domain can be used in any development environment, so the registration is only necessary for production applications. In the production tree you will see that files for domains that are not whitelisted are indicated with a red light.
For service files a green arrow indicates it is active. A yellow rectangle combined with a green arrow shows that the service file does not contain any cron rules and because of that is not running. A red square indicates that the file does contain match rules but is currently not active.
Console
At the bottom of the window the Console tab is shown. During DimML development this console is used to provide feedback regarding execution of DimML files for your DimML environment. Error messages and results from console flow elements are displayed here.
Just above the Console tab, on the right, is a list of icons. The Clear Console icon can be used to clear the current console output.

Code sharing
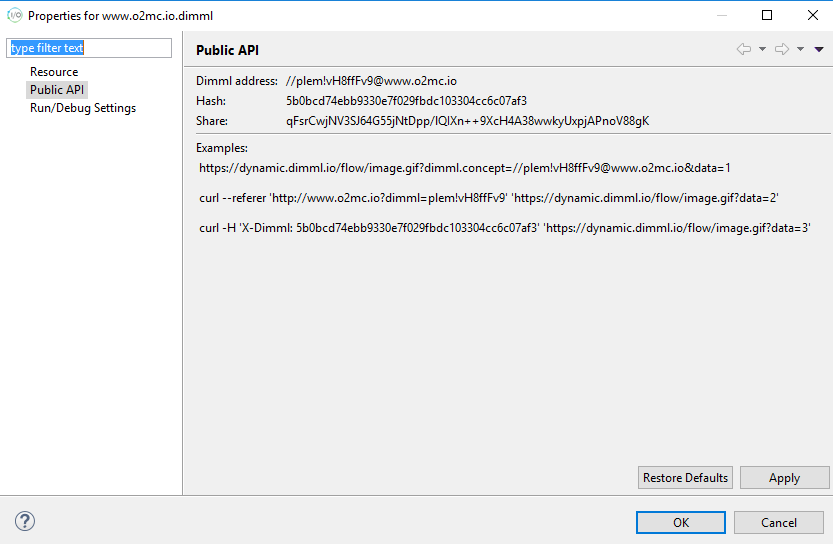
To share code with other developers you can generate a temporary share token that can be given to used to access your code. To obtain this share token, right click on a domain file and click Properties. In the Properties window, go to Public API to view information on how your development file can be accessed.
Besides examples of how to trigger concept execution of the selected file, at the top of the Properties window a Share token is displayed. Give this token to other developers and they will be able to temporarily access the published version of the selected file, including all imports from that file, from your development environment.
For other developers to use this share token, they can follow these steps:
– Go to the DimML Explorer tab
– Click on the Connect to share icon at the top of the tab
– Enter the provided share token and press OK
The share appears temporarily, until an hour after the share token creation, as an extra tree in the DimML Explorer tab and the content of the files is can be used similarly to the other trees in the DimML Explorer.
Usage
Project creation
To create an example DimML implementation, follow these steps:
– In the Project Explorer tab, do a right mouse click – New – Project…
– In the New Project dialog, select the General – Project wizard and click Next >
– Name the project HelloWorld and click Finish to create the project
The created HelloWorld project should appear in the Project Explorer. To proceed with the example DimML implementation, follow these steps:
– On the HelloWorld project, do a right mouse click – New – File
– In the New File dialog, enter www.o2mc.io.dimml as File name and click Finish
– Choose Yes when asked to convert HelloWorld to an Xtext project
The created www.o2mc.io.dimml file should appear in the Project Explorer and be automatically opened in the editor. Copy and paste the following code snippet into the file and save it:
concept Global {
match '*'

val href = `location.href`

flow
=> console
=> debug

plugin debug
}
Publishing
To publish this example project to a DimML development environment, make sure the www.o2mc.io.dimml is opened in the editor and follow these steps:
– In the toolbar, click on the Publish DimML button (or use the Ctrl+Shift+D keyboard shortcut)
– In the Publish DimML confirmation dialog, select the desired Partner and click OK
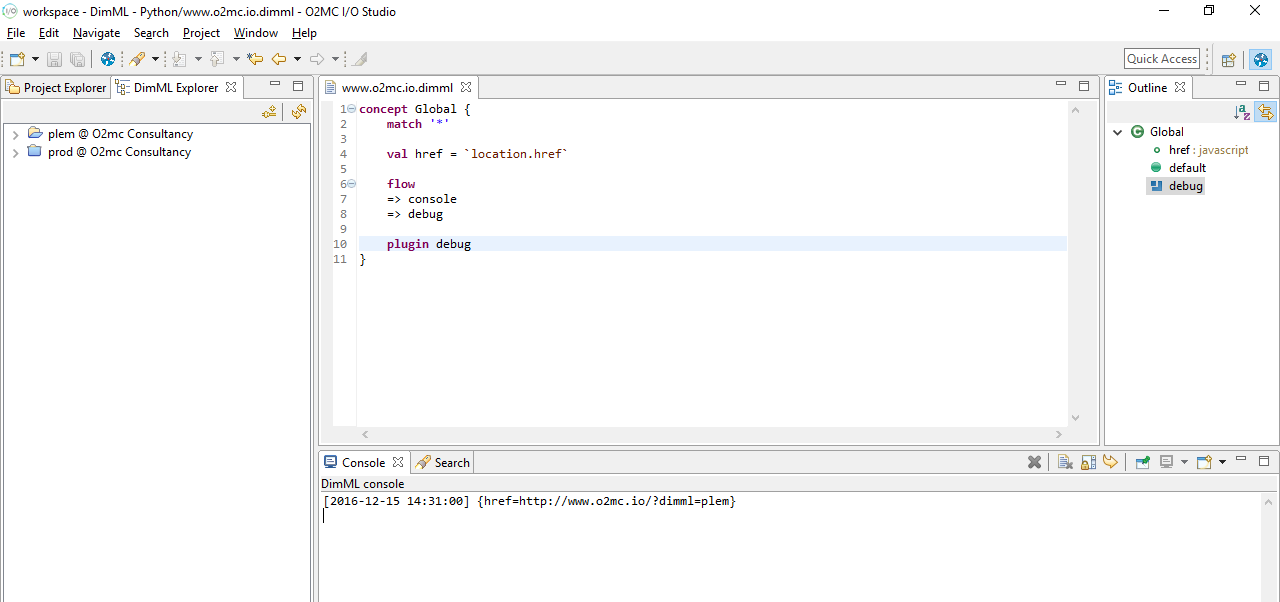
In the Console at the bottom of the window a DimML console should appear if publishing was successful. This is where the data flow information (at the point where => console is located in the DimML file) will appear when the published file is executed.
To verify that the publishing was succesful, follow these steps:
– Open the DimML Explorer
– In the top right corner of the DimML Explorer, click on Reload to update the view
– In the DimML Explorer, go to ${user} @ ${userGroup} – www.o2mc.io.dimml
– Double click on www.o2mc.io.dimml to open the content in an editor tab
The file should be present and the content should be equal to the code snippet copied earlier if the publishing was succesful.
Execution
To execute the example DimML file, follow these steps:
– For any website that does not have the Single Line of Code installed, add it automatically to the site by using the DimML Extension
– In a web browser, go to http://www.o2mc.io/?dimml=${user}
– Verify that in the browser console (F12 to open, Console tab) the following notice appears: DimML development mode: ${user}
– In the DimML console in the O2mc Studio, verify that the following line appears: [yyyy-mm-dd hh:ii:ss] {href=http://www.o2mc.io/?dimml=${user}}
Note: Replace ${user} with the DimML user name associated with the user token entered in the DimML plugin configuration step earlier in this document.